Wood floor sanding may not be rocket science, however, it still requires a lot of knowledge, experience, and specific skills. Well, wood floor sanding as a DIY project is not the best idea, to be honest, and all professionals will not recommend it. In fact, wood floor sanding is better left in the reliable hands of experienced and skilful professionals. A DIY wood floor sanding project can easily turn into a real nightmare that is hard or even impossible to fix. However, you still may feel confident and knowledgeable enough to attempt a DIY wood floor sanding project. Even if this is not the case, it is highly recommended to know at least basic and fundamental wood floor sanding staff before you hire professional help. This will help you monitor the process and explain what you want the whole sanding process to be, have a realistic idea of the final results. So without further ado, today we continue with more tips and recommendations for flawless sanding and how it can be achieved, stay tuned.
How to Use the Edger Sanding Machine
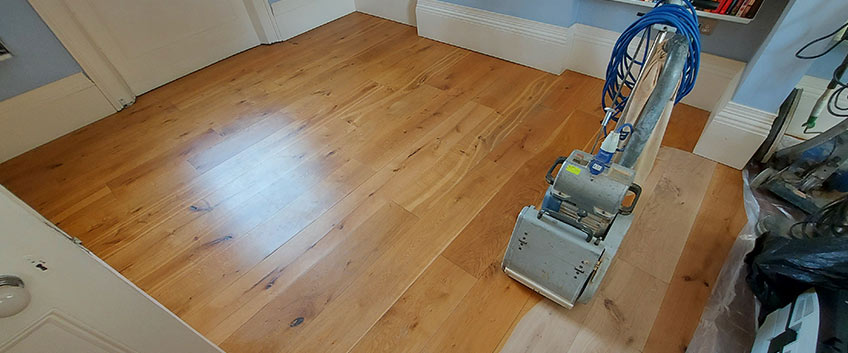
The edger is one of the basic and most essential sanding machines. It is pretty much a sanding disc mounted on a big and very powerful motor. The edger may sound like a simple tool that can be neglected during the process of sanding, however, without the edger you are not going to achieve the same flawless results you are expecting. Here are some tips for how to use the simple tool the edger is. First of all, every pass with the drum sanding machines should be followed of a pass with the edger. Make sure to use the same sanding grit for both machines. In order to minimize the gouges and swirls that the edger may leave, you can place a nylon pad under the sandpaper of the edger. You can get these nylon pads from the rental store that supplies the rental sanding machines you are getting. Once you notice the sandpaper is dull, make sure to replace it with a fresh new one. It is not recommended to use dull sandpaper because it is not powerful enough to remove all the swirls left by the previous pass with the machine. Once you are done working with the edger, you can use a flashlight to highlight all the remaining swirls you cannot notice otherwise. If there are any, you can sand them out by hand for perfect results.
Scrape Out the Corners
Once you are completely done with sanding, you can continue by working on all the spots that cannot be reached by the sanding machines you are using. In order to do so, the most effective tool you can use is a carbide paint scraper. Thanks to the sharpness of this type of scraper, you will be able to achieve great smoothness of the surface in these spots.
Don’t Skip Grits
One of the most important and essential things when working with a sanding machine is never skipping a grit when you want to achieve flawless results and a smooth and even surface of the floor. For example, the initial coarse grit is important for effectively removing the old layer of finish and evening out the surface of the floor. However, this is not what sanding is and this is not enough. The following grits you are going to use are very important for not only achieving a flawless surface of the floor but also opening up the pores of the wood for a more effective application of the finishing products. You also need to work with the grits progressively in order to remove all marks and scratches left by the previous grits.
Clean Up Between Grits
It is very important to remove all the sawdust and dirt between the different sanding grits. First of all, the sawdust can easily scratch the surface of the exposed bare wood that is prone to imperfections and issues at this moment. Additionally, the dust and dirt created by sanding, if not cleaned up thoroughly, will wear off the next grit faster. Therefore, between every grit, you want to vacuum thoroughly. You can also wrap the vacuum nozzle with tape in order to avoid marring the floor.
Wood Floor Screening
Once you are done with sanding the floor with all the machines, you can continue with screening the wooden surface. You may be tempted to skip this step as extra work. However, the screening will help you to achieve really flawless results. What screening does is blend the perimeter between where you have sanded with the edger and with the drum and also polish away all the micro-scratches left by both sanding machines. There are two ways to screen the floor and you can either use buffing machines you can also rent or a sanding pole. Either way, make sure to use a very fine abrasive.
Swing the Buffer
When you are using the buffer to screen the floor, make sure to slowly swing it from left to right as you go. You can do that by slightly lifting the hand of the machine. Start from one wall in the room and work your way back across the room.


